Tuesday, January 31, 2012

chocolate peanut butter bars


I saw the recipe for Peanut Butter Mud Bars on one of my favorite food blogs, Bake or Break, and I couldn't get the idea of eating these out of my head. Sometimes these things happen, and when I'm in the throws of a craving like this, I cannot be stopped. Even if I am missing some of the starring ingredients. I'm on a mission, and I need chocolate peanut butter bars, post haste. So, I just go for it, swapping and substituting till I try my new concoction, with fingers crossed. Sometimes things turn out great, like my cherished Peanut Butter Banana Chocolate Chip Cake (if you haven't made this yet, seriously just go and do it now—it's insane), and sometimes things do not turn out in my favor. Which is obviously not documented, and I try to erase The Mistake from my memory. This experiment turned out pretty good, not as epic as Pumpkin Bread Pudding, but I kept going back for seconds, so that's a pretty good sign, wouldn't you say?

Chocolate Peanut Butter Bars (heavily adapted from Peanut Butter Mud Bars via Bake or Break—recipe originally from The Buttercup Bake Shop Cookbook)

1 cup all-purpose flour
1/2 teaspoon baking soda
1/4 teaspoon salt
1/4 cup cocoa (I might even try more next time)
1/2 cup unsalted butter, softened
1 cup firmly packed light brown sugar
3/4 cup creamy peanut butter
1 large egg, at room temperature
1 teaspoon vanilla extract
1 cup chocolate chips (might try more of these, as well)

Frosting:
1/3 cup chocolate chips
1/3 cup peanut butter
2 tbs. sifted powdered sugar.

Preheat oven to 325°. Grease and lightly flour a 9″x 13″ baking pan.

Whisk together flour, baking soda, salt and cocoa. Set aside.

Using an electric mixer on low speed, beat butter and brown sugar until fluffy (about 2-3 minutes). Add peanut butter and beat well. Mix in egg and vanilla.

Gradually add dry ingredients and mix well. Stir in chocolate chips.

Spread mixture evenly into prepared pan. Bake 25-30 minutes, or until tester comes out clean.

While base is baking, combine the chocolate chips, peanut buter and powdered sugar in a small saucepan and cook on low until melted and evenly incorporated. Turn off heat once melted, but keep mixture on stove (the heat from the oven will keep the mixture warm).

Remove from oven, let cool for 20-30 minutes, then top with frosting. Let cool at least 30 minutes before eating.

Tuesday, January 24, 2012

sourdough bread: guest post by 2.0

I've discusses my sister-in-law quite a bit, and she's pretty much the best sister-in-law of all time. Sorry everybody else, my sisters' and I won the jackpot in the "Who Is My Only Brother Going To Marry, Please Just Let Me At Least Like Her A Little Bit Jackpot". She's one of my best friends, and she's totally down for food like the rest of us. It's so fun to share with her our favorites, and trying some of her family favorites as well. Remember the Oatmeal Cake? I do, because it's the dreamiest (...aaaand now I'm craving it, this is trouble...). Anyway, I've spoken to my sisters about each of them doing a guest post for me, since they've all got mad skills(z) and so many great recipes to share. When I was visiting in November, 2.0 made this sourdough bread that she's spent a while perfecting. It is NO JOKE. Sooooo good. I asked her to share it with us, but she said she had a few more tweaks to make, so she recently fulfilled her promise to me, and below is her post to share with us. So, without further ado, I'd like to introduce Caroline 2.0...

I would look so different if I didn't love bread as much as I do. There is something almost spiritual for me in eating the perfect artisan bread, the chewy crumb, the contrast between the crust and the melty insides, the way your jaw tells you about it if you eat too much. I'm talking about bread that has the gal and personality to make it's own shape and not rely on a bread pan to keep it corralled. I grew up right up the street from a little market that had incredible, made that day, Italian and French breads that were central to most of my meals. I also had a Father who was the proud bread-maker of our family. He loved the feeling of his hands in the dough and it was common to find crusty little remnants on his wrists or under his nails. Okay, I'll stop it with all my bread pedigree, all you need to know is that this recipe comes to you from someone who really truly loves bread and it's taken me lots of tries to get it to this wonderful place. Also note that you might need to mess with this recipe a little. I've found that often a bread recipe needs to adjusted because of humidity, flour you're using, your particular oven, the yeast you have etc. There are a lot of variable factors, so try this then make whatever tweaks are necessary to make it magical for you. 

Caroline (2.0)'s Sourdough Bread:

Ingredients: 
Dutch Oven or something you can put in the oven with a heavy lid on it. This is what I use, but if you have another version that's fine too - you need to trap the moisture in with the bread. Also, you need to replace the plastic lid handle with a metal one - I got one at home depot- it was pretty easy - if need be, just take the handle out and be really careful with the lid. 
2 cups water (warm to 110)
2 tsp yeast (no rapid rise, and don't use more, less would be better)
1 cup sourdough start (I used a heaping cup, this can vary a little too)
2 TBS sugar
1 heaping TBS salt
6 cups flour (this one will vary for sure - it's a feel thing, but around 6)


 (2.0's sourdough start—do not throw away)

1. Put the water into a large bowl with the yeast. Let the yeast dissolve, about 3-5 minutes and add to this your sourdough start, sugar and salt - stir with a wooden spoon to dissolve.


2. Add flour only a cup at a time - I insist on this - it's the only way to get to the right texture, if you add to much and try to put water in it's a mess. Just go one cup at at time, stirring with spoon, until it's not possible to stir with a spoon and then take off your rings and get your hands in there. Keep adding flour a cup at at time until the dough is starting to come together in one lump. You will need to do some kneading, and as you knead your bread will get wetter. Of course you'll need to add more flour as you knead in small amounts so you can handle the dough, but don't add to much. Put flour on your hands and although many say to knead on a floured surface, I think it's okay to knead in the bowl, then you pick up all your scraps. Just make sure your dough is still a little wet, so it's sticky but not completely stuck to you as you knead. You should knead about 8-10 minutes until it's smooth and elastic with a little sticky to the touch.


3. I usually pull my ball of bread dough out, put it on plastic wrap and scrape around my big bowl with a spatula getting the flotsom and jetsom out then I spray that same bowl, plop my dough back in and turn it around once so it has some oil on top. Make sure to cover the top with plastic wrap.


4. Let this rise overnight or 6-8 hours then pat it down, and give it a good knead - like 5 minutes of just working out the air and getting it back into a smaller ball - you might need to put it on a floured surface for this part - and coat your hands with flour to make it manageable.
5. Spray your bowl again, put the dough back in, flip it and put plastic on top again. Let this one rise a good 4 hours or so until it's doubled in size. The two rises are what give this bread such a nice sourdough flavor. While this is rising spray down your dutch over with lid - it's the only way to make this bread work.
6. When your bread dough has doubled, push it down and knead it out a little, not as much as before and shape it into two loaves. You can do this in one big loaf but I find two a lot more manageable. The way I put these in my dutch oven is by separating them down the middle with aluminum foil - which I also spray. You can put down a little cornmeal on bottom if you wish. Put these two oval loaves into your dutch oven.
7. Put plastic over the top of the dutch oven and let the bread rise about 2 hours or less - until the loaves look nice and raised. Pre-heat oven to 450 during this time.


8. Take off the plastic, put on the lid and put your bread in the oven for about 40 minutes.


9. After 40 minutes take off the lid- your bread should be starting to get light brown and look shiny. Keep the lid off - reduce heat to 375 and bake another 10 + minutes until it's nice and brown and when you check the center by checking halfway down the foil it doesn't look doughy - it needs to give you a little push back when you press in that center area between the two loaves.
10. Immediately take bread out of dutch oven and cool on wire racks.

Tuesday, January 17, 2012

vacation: re-visited

It's time for my obligatory Christmas vacation trip re-cap. Of course, the food was incredible, and amazing and was one of the main focuses of my trip. I'm going to post all the photos and names below. If you guys want any of the recipes that aren't linked, let me know which ones, and I'll try to coax them from my Mom. The only one I know for sure that she won't give up is the Special Christmas Torte She Holds Sacred So Don't Even Ask. (All the photos taken by my phone, mostly with Instagram.)

Whole Wheat Waffles with fruit and yogurt and a sauce from the Clinton Street Baking Company cookbook (which I covet greatly - remember how I ate there in New York?). 

 Citrus Wassail (recipe here)

My adorable Mom writes out a menu for the time that I'm home.  

Winter Fruit Salad with Pomegranates (recipe here) 

Butterhorn Dinner Rolls (recipe here) 

Roasted Beets 

 Pork Tenderloin with Apricot Compote

Special Christmas Torte She Holds Sacred So Don't Even Ask 

The best Eggs Benedict In The World, made by my Mom. 

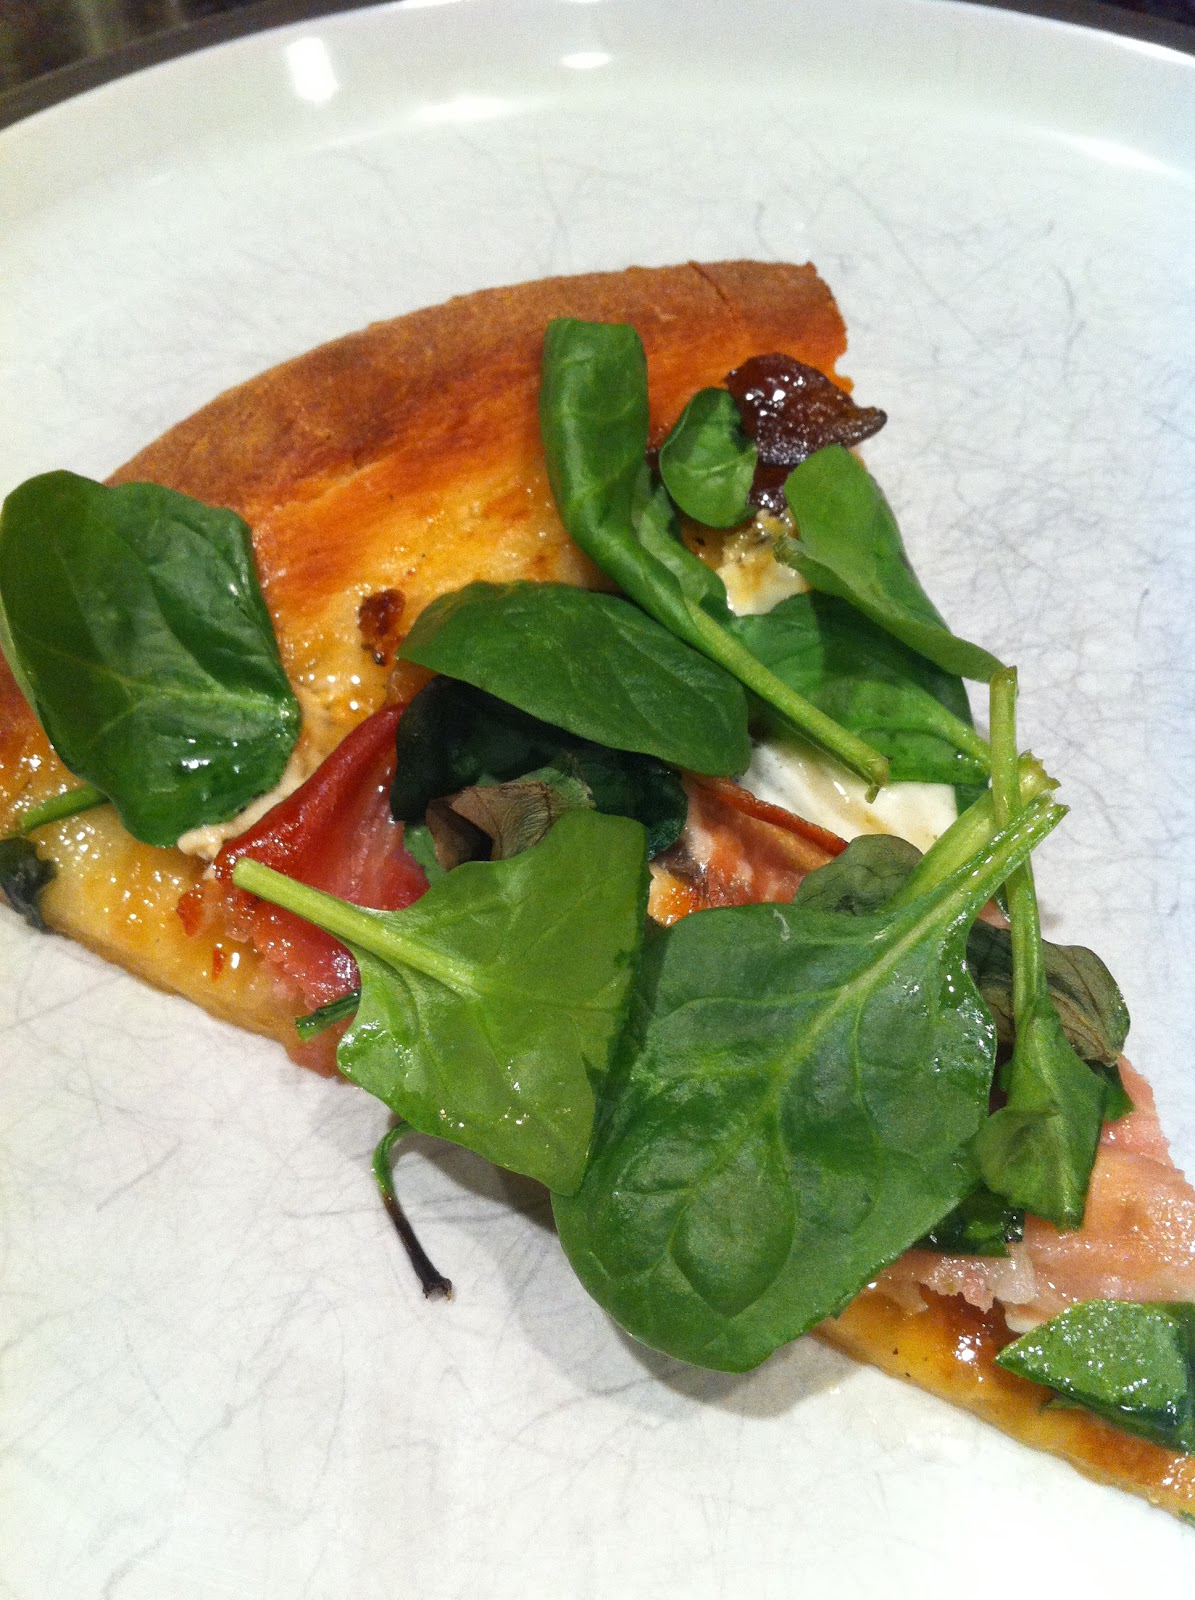
Fig Prosciutto Pizza with Spinach, adapted from this recipe 

Prosciutto wrapped Water Chestnuts

Chocolate Dipped Salted Caramels with Fluer De Sel, adapted from this recipe

Apple Pan Dore. Recipe adapted from Mama's Cafe 

Fancy Hot Chocolate. (You whip cream with cocoa and chocolate syrup then put in in warm milk then drink it!)

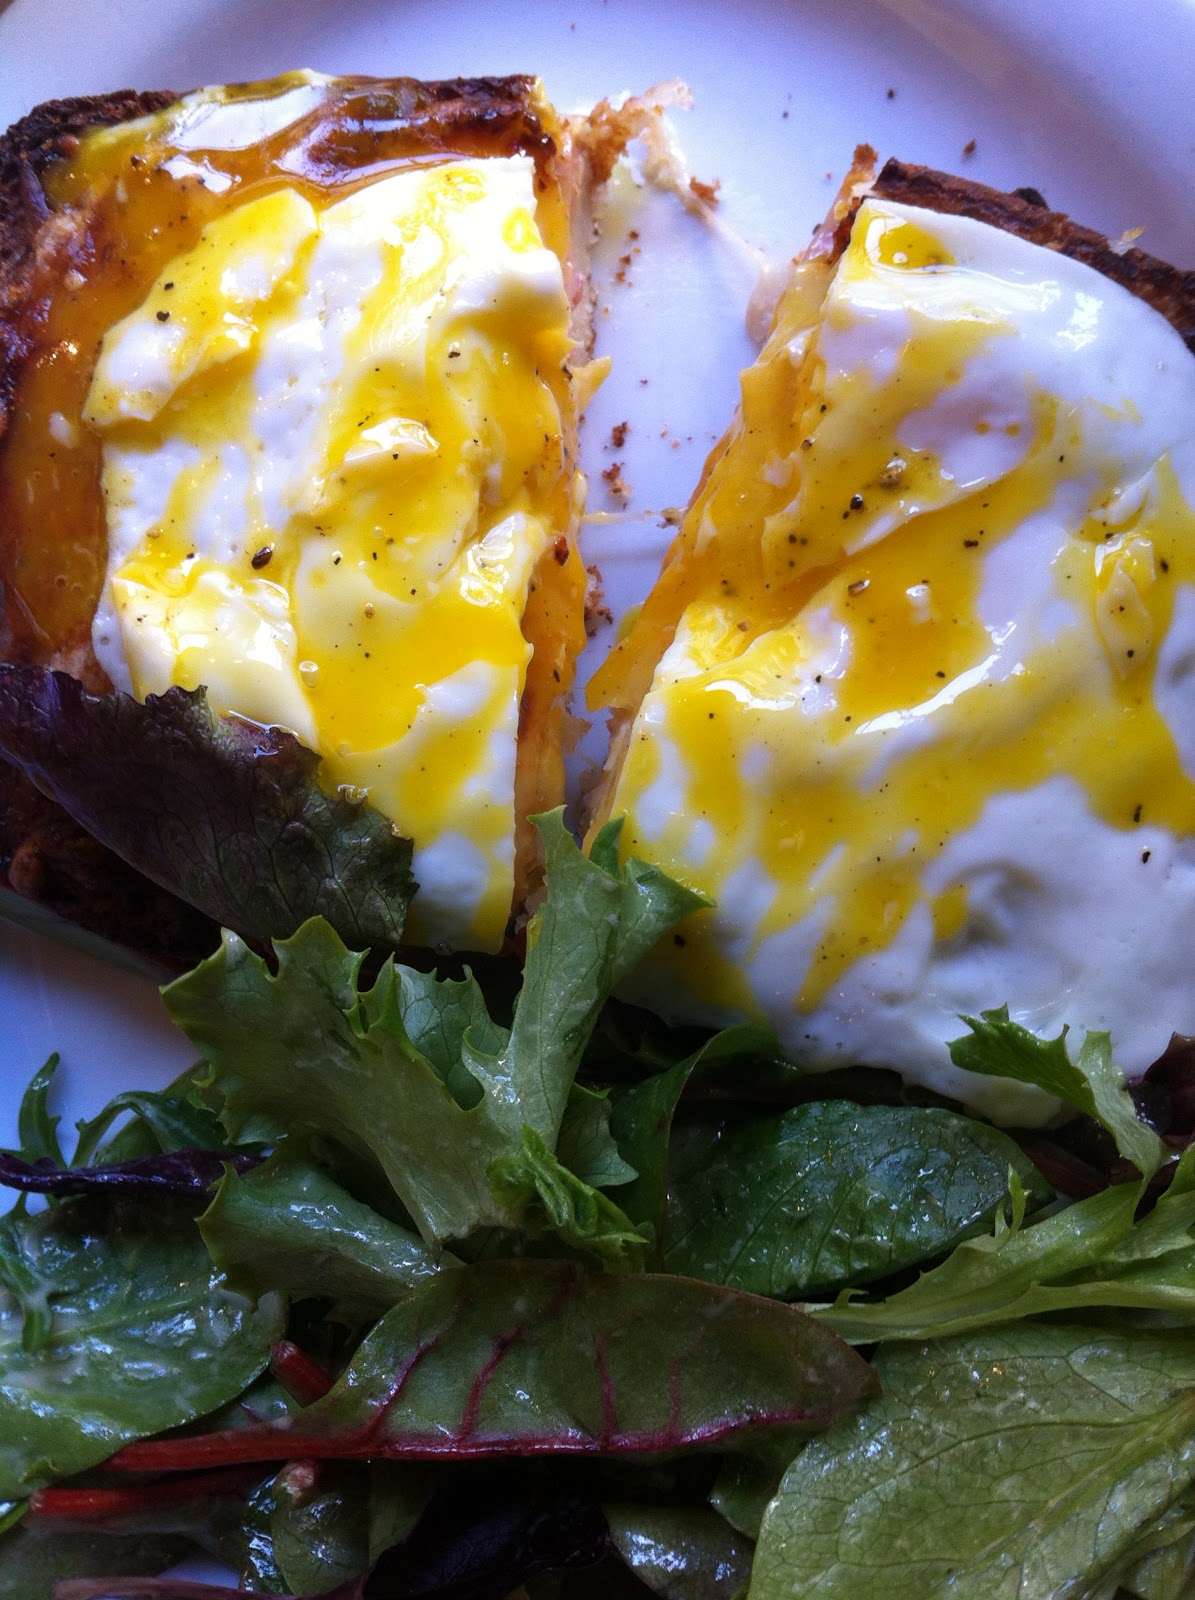
One of my favorite things to eat of all time. Croque Madame from Cafe De La Presse in San Francisco.

Chocolate Malted Crunch Ice Cream from Thrifty's. (My favorite!) 

Blackberry Cobbler, made by 2.0. Recipe from Joy of Cooking.

Wednesday, January 11, 2012

Blackberry Crisp


I made a New Year's resolution, which I never do, cause I just don't like setting myself up for failure. But, I have been thinking about doing this for a while, and I don't think it will be too crazy, so... New Year's Resolution 2012: try one new recipe a week. It could be any kind of recipe, dessert, snack, dinner, beverage, anything really. Since I sometimes (usually) get stuck in my Favorites Zone, I thought this would be a good exercise for me. (Probably the only exercise I'll get this year, let's be real.) Since blackberries were on sale at the store, I thought I'd make something new with them. When I was on vacation, 2.0 (remember my SIL) make a yummy Blackberry Crumble and I've been wanting to eat it every day since. I didn't have time to ask her for her recipe, so I looked up some options, and nothing totally worked for my time frame, so I used the base of one, with a modified topping from my Great Grandma's Apple Crisp recipe. So, I count this as new, and very, very delicious.

Blackberry Cobbler

Base:
4 cups fresh blackberries (about 18 ounces)
1/4 cup sugar
2 1/2 tablespoons all-purpose flour
3 tablespoons fresh lemon juice

Topping:
1 cup brown sugar
1 cup sugar
2/3 cup flour
1/3 cup oats
1/4 cup coconut
1/2 cup butter
1 tsp. cinnamon
1/2 tsp. freshly grated nutmeg

Directions:
Grease an 8x8 pan; preheat oven to 375. Stir blackberries, 1/4 cup sugar, 2 1/2 tablespoons flour, and the lemon juice in a bowl; set aside. Combine the ingredients for the topping well and pour on top of the blackberry mixture. Bake for 25-30 minutes until golden on top, and the blackberry juice is bubbling.


Wednesday, December 21, 2011

pumpkin eggnog ice cream

 (grainy photo from my phone)

Recently a friend sent me a recipe for Pumpkin Pie Shakes, which sounded amazing, but I had unfortunately just ran out of leftover Pumpkin Pie. It inspired me to come up another seasonal concoction, Pumpkin Eggnog Ice cream. I looked up some recipes, but so many ice cream recipes involved cooking things then tempering them, and I was (am) lazy, so wanted an easy and fast way to my Pumpkiny-Eggnog filled dreams. I remembered that when I made the ice cream for the Roasted Cherry Coconut Ice Cream sandwiches, I didn't have to do any of that. So I based some of the recipe on that. I sort of just threw a bunch of stuff together, and I must say, the result is pretty great. Don't you love when mad kitchen science works out?

PS: This would also make a nice Christmas gift, and/or a great treat to bring to a Holiday Party.

Pumpkin Eggnog Ice Cream

16 oz. Eggnog
1 cup heavy cream
One 14-ounce can sweetened condensed milk
1/2 can Spided Pumpkin
1/4 tsp. freshly ground nutmeg

Whisk together the ice cream ingredients in a large bowl. Make sure the sweetened condensed milk has been thoroughly mixed into the cream.

Put the ice cream mix in your ice cream maker and freeze according to instructions. Freeze. EAT.


Sunday, December 18, 2011

apple butter


Remember my influx of apples? Well, this is part two of Apple Fest, 2011. I've talked about apple butter before, and it's delightful. This apple butter turned out different than the last batch. I may have cooked it too long, but this stuff is much thicker. I was nervous about that, but then I tried it. It is almost like bread candy. Cinnamon apple bread candy. Yep, I just blew your mind. Now go blow someone else's mind. (Also! This makes a wonderful Christmas gift.)

Ingredients:
5 1/2 pounds apples - peeled, cored and finely chopped
4 cups white sugar
2 teaspoons ground cinnamon
1/4 teaspoon ground cloves
1/4 teaspoon salt

Directions:
Place the apples in a slow cooker. In a medium bowl, mix the sugar, cinnamon, cloves and salt. Pour the mixture over the apples in the slow cooker and mix well. Cover and cook on high 1 hour.
Reduce heat to low and cook 9 to 11 hours, stirring occasionally, until the mixture is thickened and dark brown. Uncover and continue cooking on low 1 hour. Stir with a whisk, if desired, to increase smoothness. Spoon the mixture into sterile containers, cover and refrigerate or freeze.

(I found the recipe found here) 

**PS- if anyone has any diabetes or celiac friendly recipes or sites they can recommend, can you send them my way? 

Tuesday, December 13, 2011

apple coffee cake with crumble topping and brown sugar glaze

 (photo from my instagram)

Recently, I had an influx of apples, thanks to an awesome neighbor, and I was looking for yummy ways to use them up. I was talking to my sister-in-law (2.0) and she suggested a cake that my oldest sis likes to make. So, like the homegirl she is, she emailed me this recipe so I could try it. Well, I sure am glad I did. It's definitely not low in sugar, but it's high in awesome. It's a great holiday party cake, so bring this with your ugly Christmas sweater to your next party!

Apple Coffee Cake with Crumble Topping and Brown Sugar Glaze

Cake: 

1 stick plus 2 teaspoons unsalted butter
1 1/2 cups packed light brown sugar
2 large eggs
2 cups all purpose flour
1 teaspoon baking soda
1 teaspoon ground cinnamon
1/2 teaspoon salt
1 cup sour cream
1 teaspoon pure vanilla extract
2 cups peeled, cored and chopped apples
 

Crumble Topping:
1/2 cup packed light brown sugar
1/2 cup all purpose flour
1/2 teaspoon ground cinnamon
4 tablespoons unsalted butter, softened
 

Brown Sugar Glaze:
1/2 cup packed light brown sugar
1/2 teaspoon vanilla extract
2 tablespoons water


Directions:
Preheat the oven to 350 degrees F. Lightly grease a 13 by 9-inch glass baking dish with 2 teaspoons of the butter. 
In a large bowl, cream together the remaining stick of butter and sugar until light and fluffy. Add the eggs 1 at a time, beating after the addition of each. In a separate bowl or on a piece of parchment, sift together the flour, baking soda, cinnamon, and salt. Add to the wet ingredients, alternating with the sour cream and vanilla. Fold in the apples. Pour into the prepared baking dish, spreading out to the edges.

To make the topping, in a bowl, combine the sugar, flour, cinnamon, and butter, and mix until it resembles coarse crumbs. Sprinkle the topping over the cake and bake until golden brown and set, 35 to 40 minutes. Remove from the oven and let cool on a wire rack for at least 10 minutes.


To make the glaze, in a bowl, combine the sugar, vanilla, and water and mix until smooth. Drizzle the cake with the glaze and let harden slightly.

Thursday, December 8, 2011


I'm in love with these vase mills. I saw them originally on one of my favorite blogs, Design Milk. I have a thing for salt and pepper mills. Maybe, when I have a bigger place, I can start a super sweet collection—and these will definitely make the cut, that's for sure.

Sunday, November 27, 2011

ultimate banana bread

I've been wanting to make this bread for a while. I love America's Test Kitchen more than most things. Baking Illustrated is practically my cooking/baking Bible (in addition to my family recipe book). So, needless to say, I follow their blog and collect as many recipes as I can. (Maybe one day I'll beg and beg and beg and they'll let me work in their Test Kitchen?) This was entitled Ultimate Banana Bread and uses SIX, count them, SIX extra ripe bananas. And you use the juices from the bananas for extra flavor. It's full-on. Full-on delicious!


Ultimate Banana Bread

Makes one 9-inch loaf

Be sure to use very ripe, heavily speckled (or even black) bananas in this recipe. This recipe can be made using 5 thawed frozen bananas; since they release a lot of liquid naturally, they can bypass the microwaving in step 2 and go directly into the fine-mesh strainer. Do not use a thawed frozen banana in step 4; it will be too soft to slice. Instead, simply sprinkle the top of the loaf with sugar. The test kitchen’s preferred loaf pan measures 8½ by 4½ inches; if you use a 9 by 5-inch loaf pan, start checking for doneness five minutes earlier than advised in the recipe. The texture is best when the loaf is eaten fresh, but it can be stored (cool completely first), covered tightly with plastic wrap, for up to 3 days.

1¾ cups (8¾ ounces) unbleached all-purpose flour
1 teaspoon baking soda
½ teaspoon table salt
6 large very ripe bananas (about 2¼ pounds), peeled (see note)
8 tablespoons (1 stick) unsalted butter, melted and cooled slightly
2 large eggs
¾ cup (5¼ ounces) packed light brown sugar
1 teaspoon vanilla extract
½ cup walnuts, toasted and coarsely chopped (optional)
2 teaspoons granulated sugar

1. Adjust oven rack to middle position and heat oven to 350 degrees. Spray 8½ by 4½-inch loaf pan with nonstick cooking spray. Whisk flour, baking soda, and salt together in large bowl.

2. Place 5 bananas in microwave-safe bowl; cover with plastic wrap and cut several steam vents in plastic with paring knife. Microwave on high power until bananas are soft and have released liquid, about 5 minutes. Transfer bananas to fine-mesh strainer placed over medium bowl and allow to drain, stirring occasionally, 15 minutes (you should have ½ to ¾ cup liquid).

3. Transfer liquid to medium saucepan and cook over medium-high heat until reduced to ¼ cup, about 5 minutes. Remove pan from heat, stir reduced liquid into bananas, and mash with potato masher until fairly smooth. Whisk in butter, eggs, brown sugar, and vanilla.

4. Pour banana mixture into flour mixture and stir until just combined with some streaks of flour remaining. Gently fold in walnuts, if using. Scrape batter into prepared pan. Slice remaining banana diagonally into ¼-inch-thick slices. Shingle banana slices on top of either side of loaf, leaving 1½-inch-wide space down center to ensure even rise. Sprinkle granulated sugar evenly over loaf.

5. Bake until toothpick inserted in center of loaf comes out clean, 55 to 75 minutes. Cool bread in pan on wire rack 15 minutes, then remove loaf from pan and continue to cool on wire rack. Serve warm or at room temperature.

Wednesday, November 16, 2011

family foods

I was just in Southern California to see family for a last minute, much needed getaway. I really wanted to hang out with this girl (and the rest of my family, too).


I'm sure it goes without saying, that when I'm around my family, the food is always in delicious abundance. Here are a few things we ate/made.

My sister made homemade chicken noodle soup (homemade noodles, too!), and My sister-in-law made this amazing sourdough artisan bread, which she's been working on perfecting for a bit. I'd say she hit the mark. My goodness, it was fantastic! I will see if she'll do a guest post and give us all her secrets.

Sis-in-law, will heretofore be known as 2.0 (that's my nickname as her, seeing as how we have the exact same name, but she's more awesome than me, hence the v.2.0). Anywho, 2.0 made some awesome sourdough pancakes and put shredded apples in them. They were a delight.


 Here is a photo of the start. I'll share the sourdough recipe at the end of the post. You're welcome. (You'll need a sourdough starter to make this)


And one of my favorites, and 2.0's as well, Peanut Butter Banana Chocolate Chip Cake.


Now for the Sourdough Pancakes recipe:

1 egg
2 T. oil
¼ c. milk
1 t. salt
1 t. baking soda
2 T. sugar

Add 2 cups warm water and 2 ½ cup flour to 1 cup start. Mix together and let sit overnight. In morning, put one cup in with starter again, leaving you with 4 ½ cup batter. Add any fruit or other lil' nuggets you like to the pancakes. For shredded apples, you add it to the whole batter, if you add chocolate chips or blueberries, add them to freshly poured batter. Griddle or pan should be at medium heat, flip when doughy side bubbles. When pancakes are cooked as golden as you like, EAT THEM UP.
              
***For Sourdough Waffles, add 2 more tablespoons of oil.